Pages

Showing posts with label Projects. Show all posts

Sunday, February 24, 2013

Craig's List Side Table


Craig's List is a great source for finding deals on furniture.


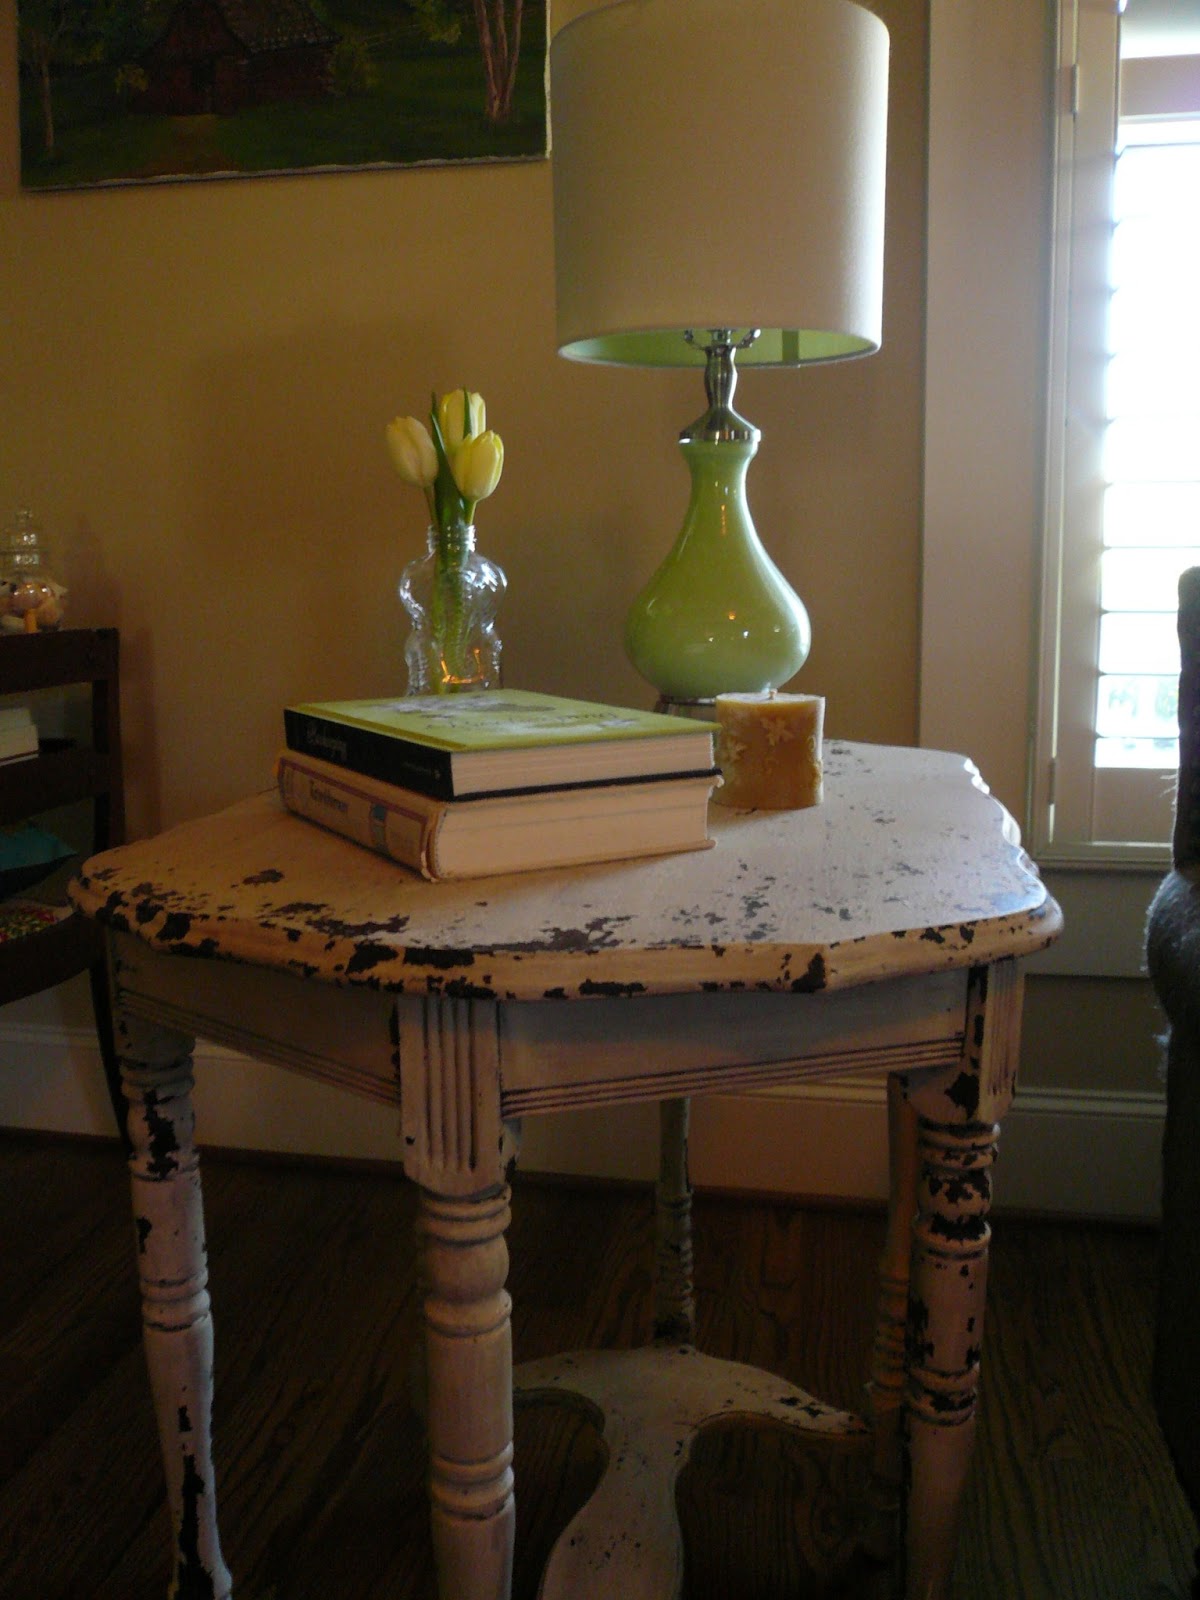
I loved the cute shape of this table and the price was right since it needed a lot of work.  The legs were wobbly and the finish looked like a cat used it as a scratching post.  There was a square shaped paint "stain" on the top.  It was also just plain dirty.  My guess is it had been in storage in someone's garage, barn, or various other outbuilding for many years.  It had spiderwebs and their eggs sacks still attached.  But if you're looking for a good deal, you have to look past all that.


The first thing I did was clean it up with mineral spirits.  You know, get all the dust and spider residue off...


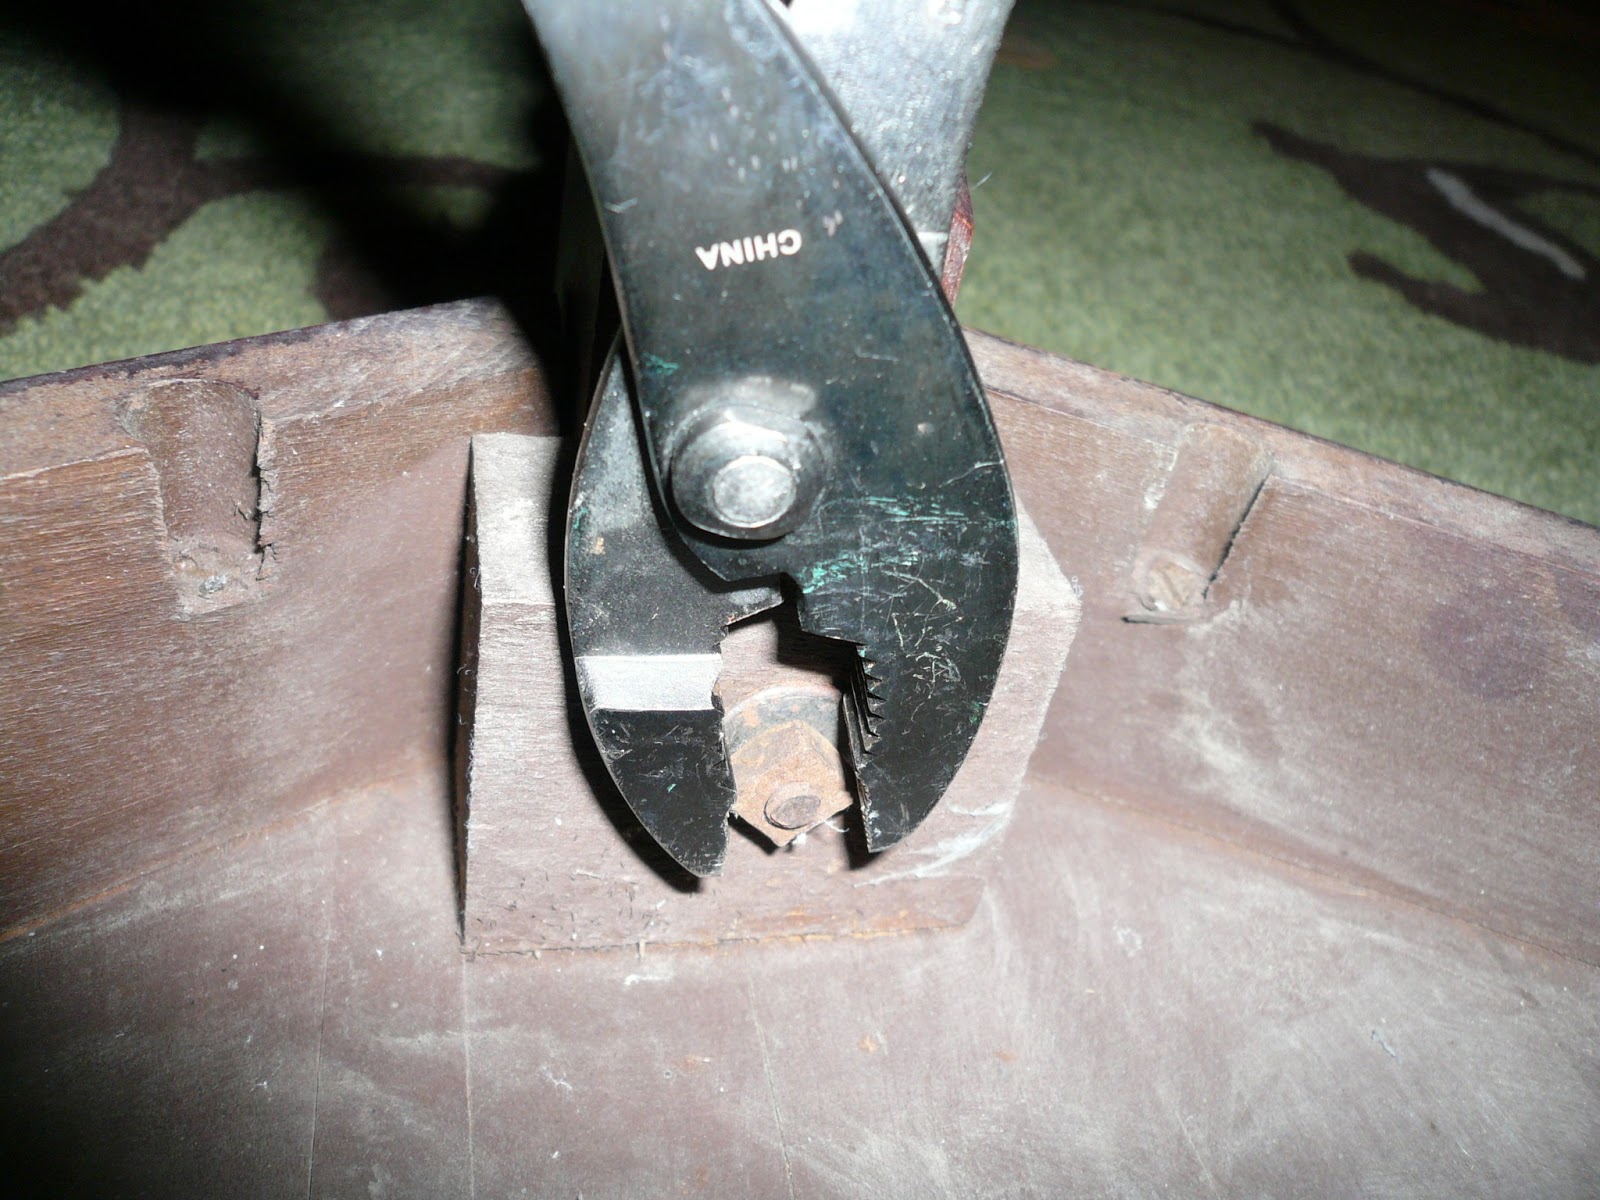
Next I stabilized the legs by tightening the existing screws where the top of the legs met the base of the top.  These were pretty rusty so I had to use a wrench, not just my hands.


I used wood glue where the bottom of the legs had detached from the base piece.  I secured the legs with some bungee cord since I didn't have any clamps on hand.  I let the wood glue dry overnight to make sure I wouldn't have any more issues with wobbly legs.  And voila!  The next morning the table was finally stable.

I went back and forth about painting or staining.  I knew this piece would look great either way but in the end I decided on paint.  There's a lot of stained wood in my house so I thought adding a painted piece would be a nice change.


I lightly sanded the piece then painted it with MMS Milk Paint in Linen.  After the second coat was dry, I used a plastic putty knife to remove the paint where it was pulling away from the surface of the table.  I then used MMS Antique Wax and let it sit for about 5 minutes before buffing off the excess wax.


This is the first piece that I've done with Milk Paint and I'm pretty pleased with the result.  My husband said, "That looks like those expensive pieces at the junk stores you drag me to."  High praise indeed!


Linking with:
Savvy Southern Style - Wow Us Wednesday
Miss Mustard Seed - Furniture Feature Friday

Sunday, January 27, 2013

Built-in Bookcases


While my house is a new construction, it's designed to mimic craftsman style.  That's part of the reason why my husband and I decided on this house as our first.  It has the trim details lacking in most new houses but it also has the conveniences of new homes (walk in closets, attached garage, and no major updates required).  However, it did lack one thing that I find almost essential in a craftsman house: no bookcases flanking the fireplace.  I realize not every craftsman home has bookcases around the fireplace but this house was obviously built to have them.


This is the "before" picture with two gaping holes around the fireplace.  So I asked my handy husband very nicely if he would consider either building bookcases or hiring someone to do it.

Having recently purchased this house, we didn't have a lot of extra money to hire someone and my husband is a bit of a perfectionist so he decided to build them himself.  And I'm so glad he did because they look wonderful!


He started by removing the existing baseboard trim so we could save a little money and reuse it.


He framed out the base.


I wanted to have an outlet on the bookcases so I wouldn't have to hide cords.


We painted the bookcases the same color as the trim to make it look like they had always been there.


We were able to reuse the baseboard.


We had to buy the top trim.  The hardware store didn't have the same trim that was on the fireplace but we found something pretty close.


I decorated with blue, green, and white because it gives the feeling of being outside.


Now the room feels like it has everything that it should.  I use this space as my "winter porch."  It has great morning sun which makes it the only room where the houseplants can survive.

Linking with:

Wednesday, November 28, 2012

Chalkboard Pots

I've wanted to try chalkboard paint for a while and I finally decided to give it a try!  For my first project I chose to do chalkboard pots since I can re-use these year round for fresh herbs in the kitchen.

I bought two terracotta pots and the corresponding dishes at my local hardware store.  I don't know if it's because it's the off season but these were really cheap.  $1.49 each! 


I then bought some chalkboard spray paint from my local craft store.  They carried a number of color options but I chose classic black because it will look good regardless of season.

I followed the instructions on the can of spray paint by doing two coats and then letting them dry for 24 hours.

Once dry, I seasoned the paint by rubbing a stick of chalk along the entire surface.


I picked up a couple rosemary topiaries from my grocery store and thought that they looked like small Christmas trees so I just removed the packaging they came in and dropped them into my new chalkboard pots.  I also wrapped some burlap garland around the bottom to give them a finished look and drew evergreen trees on the pots.


The Advent calendar is one that my husband's grandparents had hand painted for him as a child.  I can't believe it still has all of the pieces!  While I was at the craft store I also bought some Christmas themed ribbon.  Looking forward to coming up with something for these!